


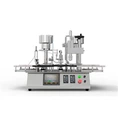
Hey there! As a supplier of capsule counters, I've been getting a lot of questions lately about how to program a capsule counter with a touch - screen interface. It's a pretty cool topic, and I'm stoked to share my knowledge with you.
First off, let's talk about why a touch - screen interface is so great for a capsule counter. It's super user - friendly. Instead of dealing with a bunch of buttons and switches, you can just tap on the screen to select different functions. This makes it easier for operators to use, especially those who aren't tech - savvy. Plus, it gives your capsule counter a modern and professional look.
Understanding the Basics of a Capsule Counter
Before we dive into programming, it's important to understand what a capsule counter does. Essentially, it's a machine that counts the number of capsules passing through it. This is crucial in the pharmaceutical and nutraceutical industries, where accurate counting is essential for proper dosing and packaging.
A typical capsule counter has sensors that detect the passage of capsules. These sensors send signals to a control unit, which then processes the data and displays the count on the screen. The touch - screen interface allows the operator to control various aspects of the counting process, such as setting the target count, starting and stopping the machine, and viewing historical data.
Choosing the Right Hardware
The first step in programming a capsule counter with a touch - screen interface is to choose the right hardware. You'll need a touch - screen display that's compatible with your control unit. There are many different types of touch - screen displays available, such as resistive and capacitive. Capacitive touch - screens are more responsive and offer better clarity, but they can be more expensive.
You'll also need a control unit that can handle the processing power required for the touch - screen interface. This could be a microcontroller or a single - board computer. Make sure the control unit has enough input and output ports to connect the touch - screen display, sensors, and other components of the capsule counter.
Selecting a Programming Language
Once you have the hardware sorted out, it's time to choose a programming language. There are several options available, but some of the most popular ones for embedded systems like capsule counters are C and C++. These languages are powerful and efficient, and they offer a lot of control over the hardware.
If you're new to programming, you might also consider using Python. Python is a high - level language that's easy to learn and has a large community of developers. There are also many libraries available for Python that can simplify the process of programming a touch - screen interface.
Setting Up the Development Environment
Before you start writing code, you'll need to set up a development environment. This involves installing the necessary software tools, such as a compiler and an integrated development environment (IDE). If you're using C or C++, you can use tools like GCC or Visual Studio Code. For Python, you can use the official Python interpreter and an IDE like PyCharm or Thonny.
Programming the Touch - Screen Interface
Now, let's get into the nitty - gritty of programming the touch - screen interface. The first thing you'll need to do is initialize the touch - screen display. This involves setting up the communication protocol between the control unit and the display. Most touch - screen displays use a serial communication protocol, such as RS - 232 or USB.
Once the display is initialized, you can start creating the user interface. This involves designing the layout of the screen, adding buttons, labels, and other graphical elements. You'll also need to write code to handle user input, such as taps and swipes on the touch - screen.
Here's a simple example of how you might create a button on the touch - screen using Python and the Tkinter library:
import tkinter as tk

def button_clicked():
    print("Button clicked!")

root = tk.Tk()
root.title("Capsule Counter Interface")

button = tk.Button(root, text="Start Counting", command=button_clicked)
button.pack()

root.mainloop()
In this example, we create a simple window with a button. When the button is clicked, the button_clicked function is called, which prints a message to the console.
Integrating the Capsule Counting Functionality
The next step is to integrate the capsule counting functionality with the touch - screen interface. This involves reading the data from the sensors and updating the count on the screen. You'll also need to write code to handle events such as reaching the target count or detecting an error.
Here's an example of how you might read data from a sensor and update the count on the screen:


import tkinter as tk

count = 0

def update_count():
    global count
    # Assume we have a function to read data from the sensor
    new_count = read_sensor_data()
    if new_count > count:
        count = new_count
        label.config(text=f"Count: {count}")
    root.after(100, update_count)

def read_sensor_data():
    # This is a placeholder function. Replace it with actual code to read from the sensor
    return count + 1

root = tk.Tk()
root.title("Capsule Counter Interface")

label = tk.Label(root, text=f"Count: {count}")
label.pack()

update_count()

root.mainloop()
In this example, we use the after method to call the update_count function every 100 milliseconds. The update_count function reads the data from the sensor and updates the count on the screen if necessary.
Testing and Debugging
Once you've written the code, it's time to test and debug it. This involves running the program on the actual hardware and checking for any errors or bugs. You might need to use a debugger to step through the code and find the source of the problem.
Make sure to test all the functions of the touch - screen interface, such as starting and stopping the machine, setting the target count, and viewing historical data. You should also test the capsule counting functionality to ensure that it's accurate.
Optimizing the Performance
After testing and debugging, you might want to optimize the performance of the program. This could involve reducing the memory usage, improving the response time, or optimizing the code for the specific hardware.
One way to optimize the performance is to use more efficient algorithms and data structures. For example, if you're storing historical data, you might use a circular buffer instead of a list to reduce the memory usage.
Conclusion
Programming a capsule counter with a touch - screen interface can be a challenging but rewarding project. By following the steps outlined in this blog post, you should be able to create a user - friendly and efficient interface for your capsule counter.
If you're in the market for a capsule counter or related equipment, we've got you covered. We also offer Soft Capsule Machine, Capsule Filler Machine, and Capsule Filler. If you're interested in learning more about our products or have any questions about programming your own capsule counter, don't hesitate to reach out. We're here to help you with your purchasing decisions and answer any technical queries.
References
- "Embedded Systems Programming with C and C++" by Michael Barr
- "Python Crash Course" by Eric Matthes
- Documentation for the hardware components used in the capsule counter