


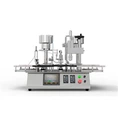
The installation process of a vial filler is a crucial step that ensures the proper functioning and efficiency of the equipment. As a vial filler supplier, I understand the importance of guiding our customers through this process to guarantee a seamless start - up. In this blog, I will provide a detailed overview of the installation process of a vial filler.
Pre - installation Preparations
Before the actual installation begins, several preparatory steps are necessary. First and foremost, you need to select an appropriate location for the vial filler. The area should be clean, well - ventilated, and have a stable floor capable of supporting the weight of the machine. The ambient temperature and humidity should be within the specified range recommended by the manufacturer. This is typically around 20 - 25 degrees Celsius and a relative humidity of 40 - 60%.
It is also essential to ensure that all the necessary utilities are available at the installation site. This includes a reliable power supply with the correct voltage and frequency as specified in the machine's manual. Usually, vial fillers require a three - phase power supply. Additionally, a clean and continuous water supply may be needed for certain models, especially those with cleaning or cooling functions. Compressed air is another common requirement, and it should be of the appropriate pressure and quality.
Another important aspect of pre - installation is the inspection of the vial filler components. When the machine is delivered to your site, carefully check all the parts against the packing list. Look for any signs of damage during transit, such as dents, scratches, or loose connections. If any issues are found, contact the supplier immediately to arrange for replacements or repairs.
Unpacking and Assembly
Once the pre - installation preparations are complete, it's time to unpack the vial filler. Start by carefully removing the outer packaging materials, such as wooden crates or cardboard boxes. Take out each component gently and place them on a clean and flat surface.
The assembly process of a vial filler can vary depending on the model and complexity of the machine. However, in general, it starts with the base unit. Place the base on the pre - selected location and ensure it is level. You can use a spirit level to check the horizontal and vertical alignment. Adjust the leveling feet of the base if necessary to achieve a perfect balance.
Next, attach the conveyor system. This is an important part of the vial filler as it transports the vials through the filling process. Connect the conveyor to the base unit according to the manufacturer's instructions. Make sure all the joints are secure and the conveyor belt is properly tensioned.
The filling mechanism is the heart of the vial filler. Carefully install the filling nozzles, pumps, and tubing. Ensure that the filling nozzles are correctly positioned and aligned with the vials on the conveyor. Connect the pumps to the power supply and the fluid source. Check all the connections for leaks or blockages.
Electrical and Pneumatic Connections
After the mechanical assembly is complete, it's time to make the electrical and pneumatic connections. For the electrical connections, follow the wiring diagram provided in the machine's manual. Connect the power cable to the appropriate power outlet, and make sure all the electrical switches and controls are in the off position during the connection process.
When making pneumatic connections, use the recommended fittings and hoses. Connect the compressed air supply to the pneumatic components of the vial filler, such as cylinders and valves. Check for any air leaks using a soapy water solution. If you notice any bubbles forming at the connections, tighten the fittings or replace the seals.


Calibration and Testing
Once all the connections are made, the vial filler needs to be calibrated. Calibration is a critical step to ensure accurate filling volumes. Start by setting up the filling parameters on the control panel. This includes the filling volume, filling speed, and the number of vials to be filled per cycle.
Use a calibrated measuring device, such as a volumetric flask, to measure the actual filling volume. Compare the measured volume with the set volume on the control panel. If there is a discrepancy, adjust the filling parameters accordingly. Repeat this process several times until the filling volume is accurate within the acceptable tolerance range.
After calibration, perform a test run of the vial filler. Start with a small number of vials to check the overall operation of the machine. Observe the movement of the conveyor, the filling process, and the performance of all the components. Look for any abnormal noises, vibrations, or malfunctions. If any issues are detected, stop the machine immediately and troubleshoot the problem.
Integration with Other Equipment
In many pharmaceutical and packaging applications, a vial filler is often part of a larger production line. It may need to be integrated with other equipment such as a Capping Machine, Vial Sealing Machine, or Stoppering Machine.
When integrating the vial filler with other equipment, ensure that the conveyor systems are properly aligned and synchronized. The transfer of vials between different machines should be smooth and seamless. Check the communication interfaces between the machines to ensure they can exchange signals and operate in a coordinated manner.
Training and Documentation
Once the installation, calibration, and integration are complete, it's important to provide training to the operators. As a vial filler supplier, we usually offer on - site training to familiarize the operators with the machine's operation, maintenance, and troubleshooting. The training covers topics such as how to use the control panel, how to change the filling parameters, and how to perform routine maintenance tasks.
Documentation is also an essential part of the installation process. Keep all the manuals, certificates, and test reports related to the vial filler in a safe place. These documents can be very useful for future reference, maintenance, and regulatory compliance.
Conclusion
The installation process of a vial filler is a complex but crucial task. By following the steps outlined above, you can ensure a successful installation and a smooth start - up of your vial filling operation. As a vial filler supplier, we are committed to providing our customers with high - quality equipment and comprehensive support throughout the installation process.
If you are interested in purchasing a vial filler or have any questions about the installation process, please feel free to contact us. Our team of experts will be happy to assist you with your procurement needs and provide you with all the necessary information.
References
- Manufacturer's Installation Manual for Vial Fillers
- Industry Standards for Pharmaceutical Packaging Equipment Installation
- Technical Papers on Vial Filling and Packaging Processes