


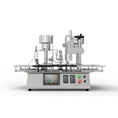
Hey there! As a supplier of capping machines, I often get asked about how to adjust the capping position of a capping machine. It's a crucial step to ensure that your products are properly sealed, and today, I'm gonna share some practical tips on this topic.
First off, let's understand why adjusting the capping position matters. A well - adjusted capping position ensures that the caps are placed evenly and tightly on the containers. This not only provides a good seal, preventing leakage and contamination, but also gives your products a professional and appealing look. Whether you're using a Capping Machine, a Vial Sealing Machine, or a Vial Capping Machine, the capping position adjustment is key.
Pre - adjustment Checks
Before you start adjusting the capping position, there are a few things you need to check.
- Container and Cap Compatibility: Make sure the containers and caps you're using are compatible with your capping machine. Different machines are designed for different sizes and types of containers and caps. Using incompatible components can lead to mis - capping and other issues. For example, if the cap is too large or too small for the container, it won't seal properly no matter how well you adjust the capping position.
- Machine Cleanliness: A dirty capping machine can affect its performance. Check for any debris, dust, or leftover product in the capping area. Clean the machine thoroughly according to the manufacturer's instructions. This includes cleaning the cap feeder, the capping head, and any other parts that come into contact with the caps or containers.
- Machine Calibration: Ensure that your capping machine is properly calibrated. Incorrect calibration can cause the capping position to be off. You can refer to the machine's manual for calibration procedures. Usually, it involves setting the correct speed, torque, and other parameters.
Adjusting the Capping Position
Once you've completed the pre - adjustment checks, it's time to start adjusting the capping position. Here's a step - by - step guide:
-
Vertical Position Adjustment:
- Height Adjustment: Most capping machines allow you to adjust the height of the capping head. This is important to ensure that the cap is placed at the correct level on the container. To adjust the height, locate the height adjustment mechanism on the capping machine. This is usually a hand - wheel or a set of screws. Turn the hand - wheel or loosen the screws to raise or lower the capping head. You can make small adjustments and then test the capping process on a few sample containers. Check if the cap is sitting at the right height on the container. If it's too high, the seal may not be tight; if it's too low, it may damage the container or the cap.
- Depth Adjustment: In addition to height, you may also need to adjust the depth at which the cap is applied. Some capping machines have a depth adjustment feature. This is particularly important for containers with a specific sealing depth requirement. For example, some vials may require the cap to be inserted a certain distance into the neck of the vial for a proper seal. Adjust the depth according to the container's specifications.
-
Horizontal Position Adjustment:
- Lateral Alignment: The capping head needs to be aligned horizontally with the center of the container. Mis - alignment can cause the cap to be placed off - center, leading to a poor seal. To adjust the lateral position, look for the lateral adjustment screws or knobs on the capping machine. Loosen the screws or turn the knobs to move the capping head left or right. Check the alignment by placing a container under the capping head and observing if the cap is centered on the container. Make small adjustments until the cap is properly aligned.
- Front - to - Back Alignment: You also need to ensure that the capping head is aligned correctly in the front - to - back direction. Similar to the lateral alignment, there are usually adjustment mechanisms for this. Adjust the front - to - back position so that the cap is applied at the correct position on the container.
-
Angle Adjustment: In some cases, you may need to adjust the angle of the capping head. This is especially important for containers with irregular shapes or for applications where the cap needs to be applied at a specific angle. Look for the angle adjustment feature on your capping machine. It may involve loosening some bolts and then tilting the capping head to the desired angle. Again, test the capping process on sample containers to ensure that the cap is applied at the correct angle.

Testing and Fine - Tuning
After making the initial adjustments, it's crucial to test the capping process. Run a few containers through the capping machine and check the results. Here's what you should look for:
- Cap Placement: Check if the caps are placed evenly and centered on the containers. If the caps are off - center or not placed at the correct height, make further adjustments to the capping position.
- Seal Quality: Examine the seal quality. A good seal should be tight and leak - proof. If you notice any leaks or loose caps, it may indicate that the capping position needs further adjustment or that there are other issues with the machine or the components.
- Cap Damage: Look for any signs of cap damage, such as cracks or deformation. Damaged caps can be a result of incorrect capping position or excessive torque. If you find damaged caps, adjust the capping position and also check the torque settings on your machine.
Fine - tune the capping position based on the test results. Make small adjustments and test again until you achieve the desired capping quality.
Troubleshooting
Even after careful adjustment, you may encounter some issues. Here are some common problems and their solutions:
- Mis - Capping: If the caps are not being placed correctly on the containers, check the following:
- Cap Feeder Issues: The cap feeder may not be delivering the caps properly. Check for any jams or blockages in the cap feeder. Adjust the speed and alignment of the cap feeder if necessary.
- Capping Head Alignment: Double - check the vertical, horizontal, and angle adjustments of the capping head. Make sure it's aligned correctly with the containers.
- Loose Caps: If the caps are not sealing tightly, it could be due to:
- Insufficient Torque: Increase the torque setting on your capping machine. However, be careful not to set the torque too high, as this can damage the caps or containers.
- Incorrect Capping Position: The cap may not be placed at the correct height or depth. Adjust the capping position accordingly.
- Damaged Caps or Containers: If you notice damaged caps or containers, consider the following:
- Excessive Torque: Reduce the torque setting on the capping machine.
- Incorrect Capping Position: The capping head may be applying too much pressure in the wrong place. Adjust the capping position to ensure a more even application of pressure.
Conclusion
Adjusting the capping position of a capping machine is a process that requires patience and attention to detail. By following the steps outlined above, you can ensure that your capping machine is working at its best, providing a proper seal for your products.
If you're looking for a high - quality capping machine or need more guidance on capping machine operation and adjustment, we're here to help. We offer a wide range of Capping Machine, Vial Sealing Machine, and Vial Capping Machine solutions to meet your specific needs. Contact us for more information and let's start a discussion about how we can help you improve your capping process.
References
- Manufacturer's manuals of capping machines
- Industry best practices for capping machine operation and maintenance